Create your Test Local Wallet
Table of Contents
Create a Test Local Wallet
We now know what the installed bitshares-core folder contains and how inside folders and files have been structured. In this section, we test running two programs (witness_node and cli_wallet) to examine and get familiar with the BitShares Blockchain data and application program.
Also, we will launch a cli_wallet and import an existing BitShares account and check the balance. Let’s start.
Note: After my initial installation, a database (blocks binary) file size was 306.9MB. And after running a witness_node for several hours, the file size grew to 10GB.
We assume that you are opening a terminal window and moved (i.e., cd bitshares-core) to the bitshares-core folder.
1. Run a Test Local Network
Right now, there is no public testnet, so the only way to test is to run your own private network. To do this, launch a witness_node to generate blocks.
1-1. Move to a witness_node folder
cd programs/witness_node
Note
If you have previously run a witness node, you may need to remove the old blockchain. (at this early stage, new commits often make it impossible to reuse an old database.)
rm -r witness_node_data_dir
1-2. Run a witness_node in your local (private) network
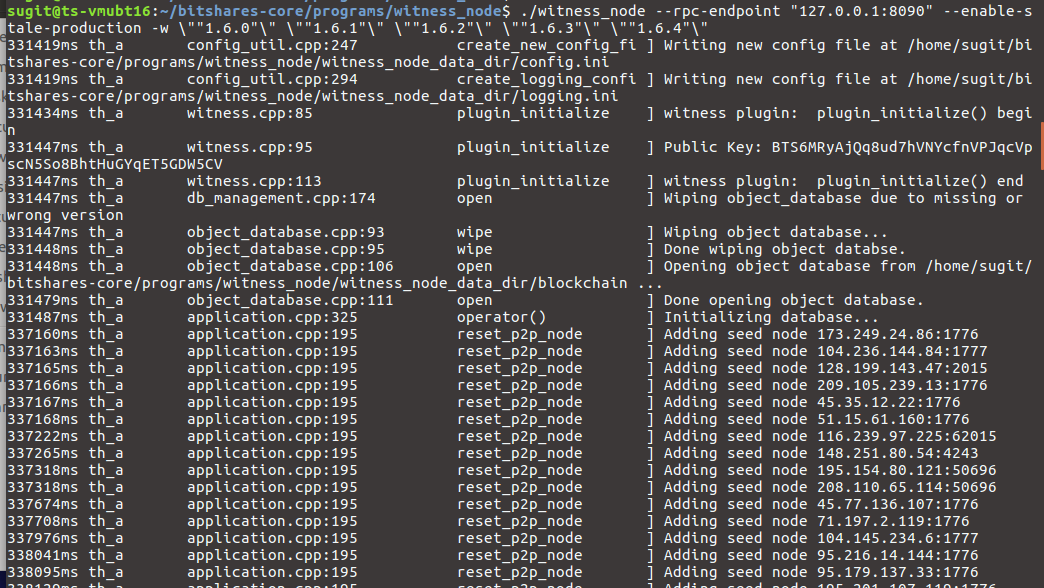
./witness_node --rpc-endpoint "127.0.0.1:8090" --enable-stale-production -w \""1.6.0"\" \""1.6.1"\" \""1.6.2"\" \""1.6.3"\" \""1.6.4"\"
The initial genesis state has ten pre-configured delegates (1.6.0-9) that all use the same private key to sign their blocks, and the witness_node has the private keys for these initial delegates built in. Launching witness_node this way allows you to act as all ten delegates.
2. Launch a Test Local Wallet
Now, open a second terminal window, launch a cli_wallet program to interact with the network.
2-1. Move to a cli_wallet folder
cd programs/cli_wallet
Note
Similarly, if you have previously run a wallet, you may need to wipe out your old wallet.
rm wallet.json
2-2. Launch a cli_wallet
./cli_wallet
If you launch the cli_wallet successfully, you will see new >>> to the end.
3. Unlock a wallet
Before doing anything with the new wallet, set a password set_password and unlock unlock the wallet.
Danger
Your passwords will be displayed on the screen!!
3-1. Set a wallet password
new >>> set_password my_password
3-2. Unlock the wallet
locked >>> unlock my_password

unlocked >>>
Tip
After this point, you can issue any command available to the cli-wallet (Wallet APIs) or construct your own transaction manually.
- If you have already a BitShares account, you can look up the account balance information. For example,
unlocked >>>
list_account_balances your-account-name
- If you want to get more detailed information, use gethelp(). For example,
unlocked >>
gethelp "list_account_balances"
Note
(At this moment) Next step. Please refer, after “3.Unlock the Cli_Wallet” section.
Example Outputs
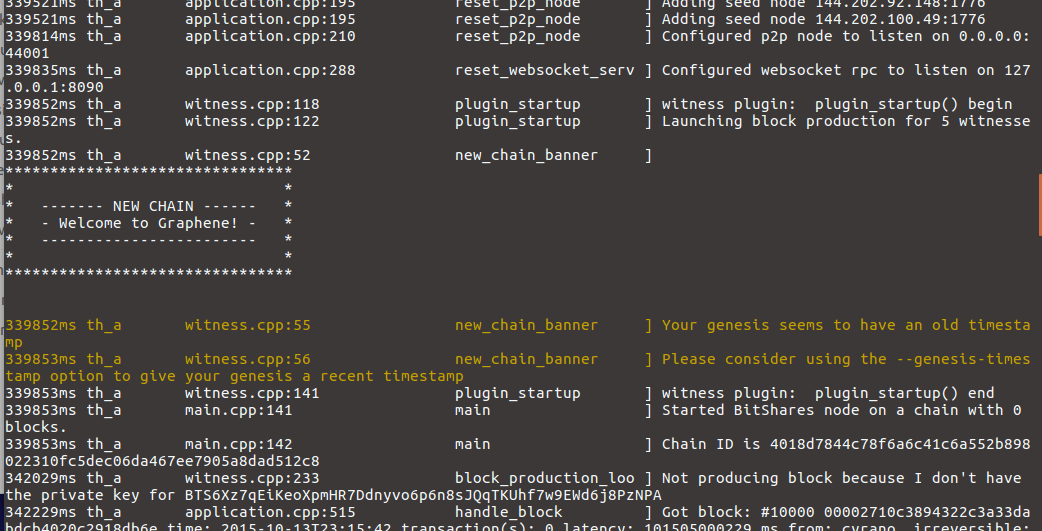
Run Local witness node
The below shows a process after started running..
./witness_node --rpc-endpoint "127.0.0.1:8090" --enable-stale-production -w \""1.6.0"\" \""1.6.1"\" \""1.6.2"\" \""1.6.3"\" \""1.6.4"\"
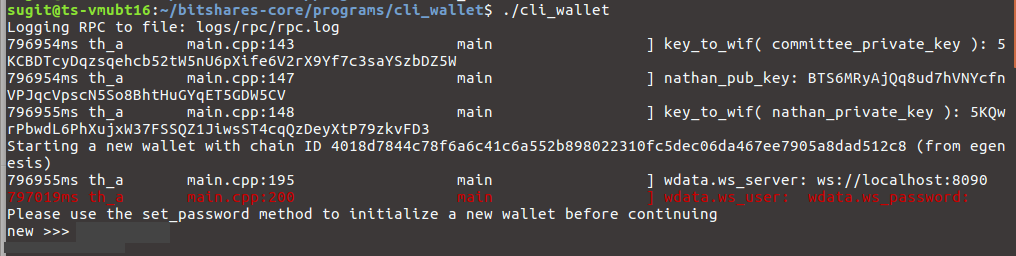
Run cli wallet
The below shows a process after started running..
./cli_wallet
In the process,
.._pub_keyandkey_to_wifvalues are from a config.ini file.
Tip
The chain ID is a hash of the genesis state. All transaction signatures are only valid for a single chain ID. So editing the genesis file will change your chain ID, and make you unable to sync with all existing chains (unless one of them has exactly the same genesis file you do).